
This also applies to cable, chain, and webbing.
Gear that is anchored includes anchors, rocks, trees, tripods, trucks, etc.
A "bight" is a simple loop in a rope that does not cross itself.
A "bend" is a knot that joins two ropes together. Bends can only be attached to the end of a rope.
A "hitch" is a type of knot that must be tied around another object.
"Descending devices" (e.g., ATCs, Brake Bar Racks, Figure 8s, Rescue 8s, etc) create friction as their primary purpose. The friction in descending devices is always considered when calculating forces.
The "Safety Factor" is the ratio between the gear's breaking strength and the maximum load applied to the gear (e.g., 5:1).
Special items, named "slack points," allow you to position ropes anywhere on the workspace. They are a powerful, and often overlooked, tool in vRigger.
You add a slack point by dragging one from the Gear Finder or a gear pane and dropping it on chain, rope, or webbing. Unlike other items in vRigger, you can drop a slack point on these three items.
You can drag the slack point anywhere on the workspace to route the rope to that location. Slack points are only visible when something is selected on the workspace.
You can use a slack point to show that a rope is passing over an edge as displayed in the following illustration. In this case, we used a line "shape" to draw the edge.
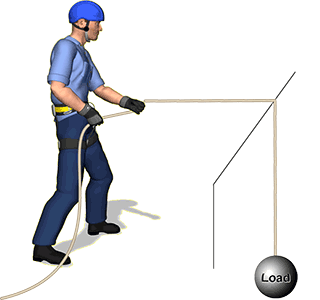
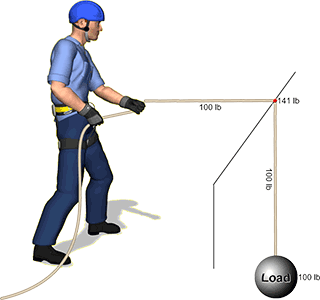
Forces can be displayed on slack points by selecting the slack point and then setting Show Forces in the properties pane to Always. In this illustration, you can see that there would be approximately 140 pounds of force on the edge when raising a 100-pound load.
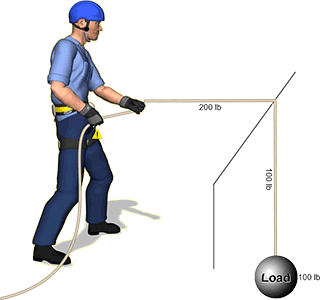
You also set the friction of a slack point so the edge's friction will be considered during force calculations. This next illustration shows how the force that is required to raise this load doubles when the friction is set to 50%.
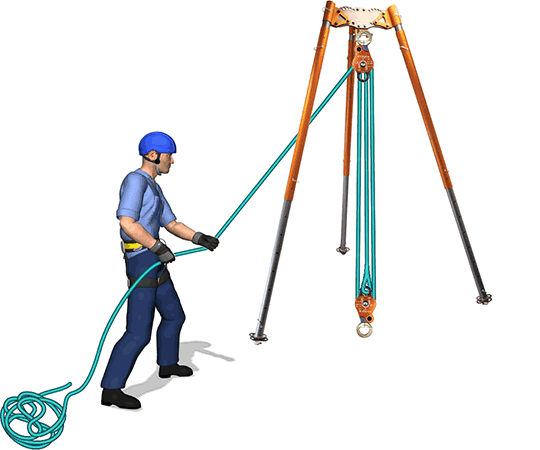
Learn how you can use slack points to get ropes to route between tripod legs.
You can use slack points to "create" additional rope connection points on gear. For example, four slack points were used in the following illustration to create the appearance that the rope is connected to, and deflected by, the chairlift.
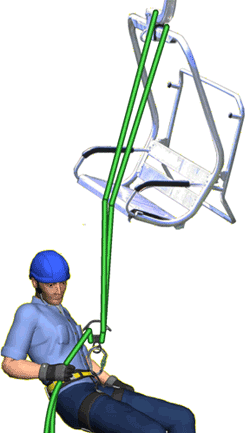
A sample file explains how the rope was routed around the chair.
Slack points were used in this next illustration to "connect" the ropes to a valve. We've shown the slack points in this illustration, but they will be hidden unless something is selected on the workspace.
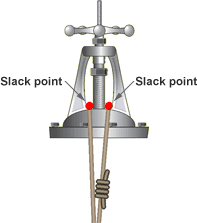
The page that explains how to insert a picture explains how you can use slack points to "connect" gear to a mountain and an industrial site.
When a slack point is connected to webbing, you can rotate the slack point to create, or remove, twists in the webbing.
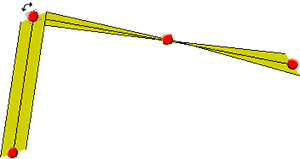
You can use multiple slack points to simulate curves in chain and webbing.
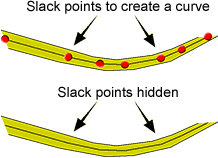
Learn how rope joiners invisibly connect ropes.