This also applies to cable, chain, and webbing.
Gear that is anchored includes anchors, rocks, trees, tripods, trucks, etc.
A "bight" is a simple loop in a rope that does not cross itself.
A "bend" is a knot that joins two ropes together. Bends can only be attached to the end of a rope.
A "hitch" is a type of knot that must be tied around another object.
"Descending devices" (e.g., ATCs, Brake Bar Racks, Figure 8s, Rescue 8s, etc) create friction as their primary purpose. The friction in descending devices is always considered when calculating forces.
The "Safety Factor" is the ratio between the gear's breaking strength and the maximum load applied to the gear (e.g., 5:1).
The AZTEK pulley system is a pre-rigged, mechanical advantage kit. It was developed and refined by Reed Thorne of Ropes That Rescue. The name AZTEK is a mnemonic for Arizona Technician's Edge Kit.
At its core, the AZTEK system is comprised of two double-pulleys with integrated Prusiks. The specific components in the system vary based on the distributer (i.e., CMC Rescue, Rock Exotica, Sterling Rope, etc), but the common elements are the two Rock Exotica AZTEK pulleys which have side-beckets and an attachment point for the Prusiks.
Assembling an AZTEK system in vRigger is a little challenging, just as assembling the actual system is a little challenging. The easiest way to use the AZTEK system in vRigger is to copy and paste the system as explained on this page. Or you can learn how to assemble the AZTEK using the individual components.
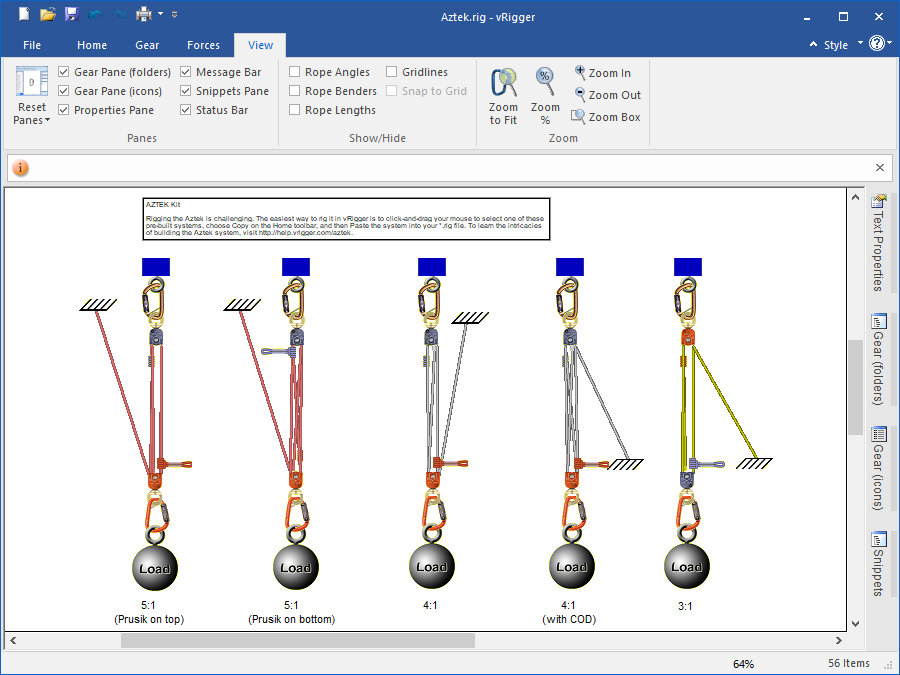
(The Aztek.rig file should also be in the Documents\vRigger folder on your computer, although the downloadable sample file may be more up-to-date.)


Note that one end of the rope is attached to a pulley (the blue pulley in this example) with a tiny rope eye. When you drag this pulley, hold the Ctrl key pressed so the eye will also get dragged. Learn about dragging connected gear.