

This also applies to cable, chain, and webbing.
Gear that is anchored includes anchors, rocks, trees, tripods, trucks, etc.
A "bight" is a simple loop in a rope that does not cross itself.
A "bend" is a knot that joins two ropes together. Bends can only be attached to the end of a rope.
A "hitch" is a type of knot that must be tied around another object.
"Descending devices" (e.g., ATCs, Brake Bar Racks, Figure 8s, Rescue 8s, etc) create friction as their primary purpose. The friction in descending devices is always considered when calculating forces.
The "Safety Factor" is the ratio between the gear's breaking strength and the maximum load applied to the gear (e.g., 5:1).
To connect use a Black Diamond ATC in vRigger, connect an ATC to a carabiner, and then drop a rope on the ATC.
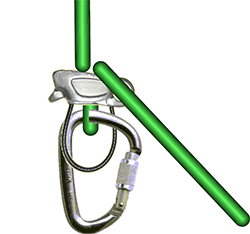
Unfortunately, due to a limitation in vRigger, the carabiner will look like it penetrates the short section of rope between the ATC and carabiner. You can see that, above.
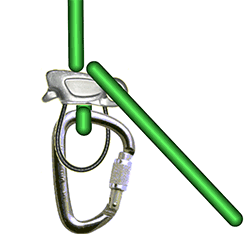
Depending on your needs, that rope drawing issue may or may not be a problem. The following workaround shows how you can improve the appearance of the rope, but it isn't perfect and is undeniably a pain. It is best to wait until your vRigger illustration is complete before using this workaround.

Here is the XP model of the ATC. We again used a small rope to cover the carabiner. We also used rope benders to curve the rope.
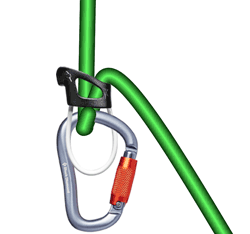
The above solution isn't perfect, but it may help.