This also applies to cable, chain, and webbing.
Gear that is anchored includes anchors, rocks, trees, tripods, trucks, etc.
A "bight" is a simple loop in a rope that does not cross itself.
A "bend" is a knot that joins two ropes together. Bends can only be attached to the end of a rope.
A "hitch" is a type of knot that must be tied around another object.
"Descending devices" (e.g., ATCs, Brake Bar Racks, Figure 8s, Rescue 8s, etc) create friction as their primary purpose. The friction in descending devices is always considered when calculating forces.
The "Safety Factor" is the ratio between the gear's breaking strength and the maximum load applied to the gear (e.g., 5:1).
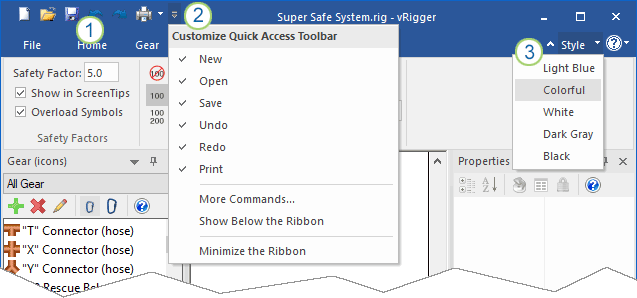
Learn about the vRigger user interface.
vRigger features a Ribbon-style toolbar that is similar to the toolbars found in Microsoft Office©. This type of toolbar groups common tasks, such as the force calculation tasks shown here, which makes them easier to locate.
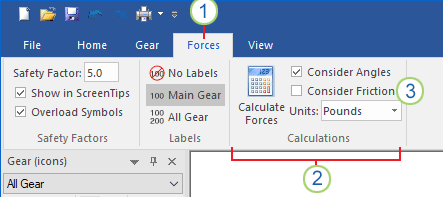
Five tabs, File, Home, Gear, Forces, and View are available on the toolbar.
The File tab is displayed on the left side of the toolbar. This tab contains commands to open, save, close, and print the vRigger workspace. It also provides access to the vRigger Options.
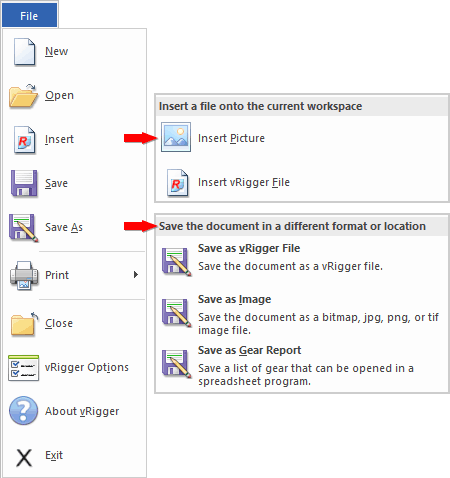
The Insert command inserts the contents of an existing rigging file onto the currently displayed workspace.
You can customize vRigger to suit your preferences.